
博客的基础设置,主要以hugo.yaml文件为主。详细参考官方文件stack中文文档和stack官方文档
以下所有修改操作请养成备份的习惯
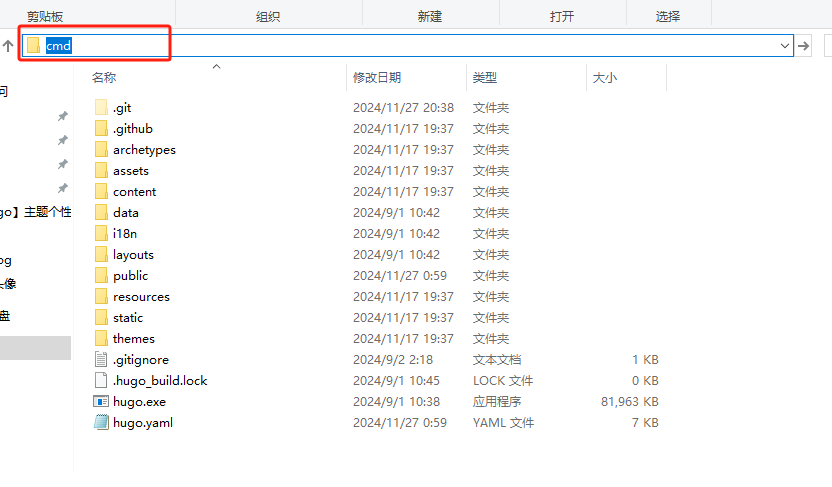
1.调试
部署到github上反复调试太过麻烦,可以使用以下方法:
- 在blog主目录唤起CMD调试窗口
- 键入
hugo server -D启动网页。复制http://localhost:1313/打开网页。
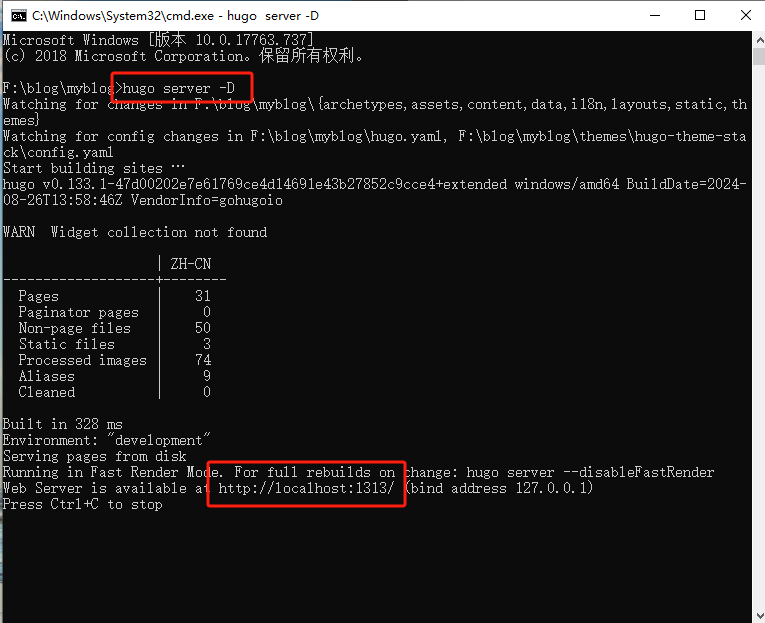
- 在hugo.yaml中更新的内容保存后,在
http://localhost:1313/网页会立刻显现。
2.主页功能
中英文
DefaultContentLanguage:博客默认语言。设置为:zh-cn
将languages下除zh-cn的语言删除
1 2 3 4 5 6 7 8DefaultContentLanguage: zh-cn languages: zh-cn: languageName: 简体中文 title: 林梦飞 #站名 weight: 2 params: description: 演示说明
单页文章数
搜索pagerSize,修改数量即可
|
|
头像、站名、简介
1 2 3 4 5 6 7sidebar: emoji: 🤣 subtitle: 欢迎来到我的blog,搭建中 #blog简介 avatar: #blog头像 enabled: true local: true src: img/avatar.jpg #头像文件位置主文件夹下assets\img
- 本地路径:请把图片放在站点根目录的
assets/img文件夹下。 例如assets/img/avatar.jng, 并填入img/avatar.jng. - 图片最大支持150*150
网站图标
|
|
favicon存放ico图像,可以去网上找一个。存放在主目录的static文件夹下
社交链接
|
|
- ico文件存在主目录的\assets\icons内
- icons文件可以直接从这里下载:Tabler Icons
3.修改背景色
- 修改主题文件夹下
assets/scss/variables.scss文件
|
|
- 修改文章卡片颜色
|
|
4.友链、归档多列显示
- 修改主题文件夹下
assets/scss/custom.scss文件(不存在则自行创建),引入以下css样式代码1 2 3 4 5 6 7 8 9 10 11 12 13 14 15 16 17 18 19@media (min-width: 1024px) { .article-list--compact { display: grid; // 目前是两列,如需三列,则后面再加一个1fr,以此类推 grid-template-columns: 1fr 1fr; background: none; box-shadow: none; gap: 1rem; article { background: var(--card-background); border: none; box-shadow: var(--shadow-l2); margin-bottom: 8px; margin-right: 8px; border-radius: 16px; } } }
5.添加“回到顶部”按钮
-
准备一张回到顶部(右键另存)的图片,放到
assets/icons文件夹下(不存在则自行创建) -
将以下代码复制到主题文件夹下
layouts/partials/footer/custom.html文件中(不存在则自行创建)1 2 3 4 5 6 7 8 9 10 11 12 13 14 15 16 17 18 19 20 21 22 23 24 25 26 27 28 29 30 31 32 33 34 35 36 37 38 39 40 41 42 43 44 45 46 47<style> #backTopBtn { display: none; position: fixed; bottom: 30px; z-index: 99; cursor: pointer; width: 30px; height: 30px; background-image: url({{ (resources.Get "icons/backTop.svg").Permalink }}); } </style> <script> /** * 滚动回顶部初始化 */ function initScrollTop() { let rightSideBar = document.querySelector(".right-sidebar"); if (!rightSideBar) { return; } // 添加返回顶部按钮到右侧边栏 let btn = document.createElement("div"); btn.id = "backTopBtn"; btn.onclick = backToTop rightSideBar.appendChild(btn) // 滚动监听 window.onscroll = function() { // 当网页向下滑动 20px 出现"返回顶部" 按钮 if (document.body.scrollTop > 20 || document.documentElement.scrollTop > 20) { btn.style.display = "block"; } else { btn.style.display = "none"; } }; } /** * 返回顶部 */ function backToTop(){ window.scrollTo({ top: 0, behavior: "smooth" }) } initScrollTop(); </script>
6.代码块折叠按钮
-
准备一张向下展开图片(右键另存),放到
assets/icons目录下 -
将以下代码复制进主题文件夹下
layouts/partials/footer/custom.html(文件不存在则自行创建)1 2 3 4 5 6 7 8 9 10 11 12 13 14 15 16 17 18 19 20 21 22 23 24 25 26 27 28 29 30 31 32 33 34 35 36 37 38 39 40 41 42 43 44 45 46 47 48 49 50 51 52 53 54 55 56 57 58 59 60 61 62 63 64 65 66 67 68 69 70 71 72 73 74 75 76 77 78 79 80<style> .highlight { /* 你可以根据需要调整这个高度 */ max-height: 400px; overflow: hidden; } .code-show { max-height: none !important; } .code-more-box { width: 100%; padding-top: 78px; background-image: -webkit-gradient(linear, left top, left bottom, from(rgba(255, 255, 255, 0)), to(#fff)); position: absolute; left: 0; right: 0; bottom: 0; z-index: 1; } .code-more-btn { display: block; margin: auto; width: 44px; height: 22px; background: #f0f0f5; border-top-left-radius: 8px; border-top-right-radius: 8px; padding-top: 6px; cursor: pointer; } .code-more-img { cursor: pointer !important; display: block; margin: auto; width: 22px; height: 16px; } </style> <script> function initCodeMoreBox() { let codeBlocks = document.querySelectorAll(".highlight"); if (!codeBlocks) { return; } codeBlocks.forEach(codeBlock => { // 校验是否overflow if (codeBlock.scrollHeight <= codeBlock.clientHeight) { return; } // 元素初始化 // codeMoreBox let codeMoreBox = document.createElement('div'); codeMoreBox.classList.add('code-more-box'); // codeMoreBtn let codeMoreBtn = document.createElement('span'); codeMoreBtn.classList.add('code-more-btn'); codeMoreBtn.addEventListener('click', () => { codeBlock.classList.add('code-show'); codeMoreBox.style.display = 'none'; // 触发resize事件,重新计算目录位置 window.dispatchEvent(new Event('resize')) }) // img let img = document.createElement('img'); img.classList.add('code-more-img'); img.src = {{ (resources.Get "icons/codeMore.png").Permalink }} // 元素添加 codeMoreBtn.appendChild(img); codeMoreBox.appendChild(codeMoreBtn); codeBlock.appendChild(codeMoreBox) }) } initCodeMoreBox(); </script>
7.隐藏目录
将以下代码复制到主题文件夹下layouts\partials\widget\toc.html替换原有代码
|
|
8.目录去序号
在themes\hugo-theme-stack\assets\scss\custom.scss内添加以下代码:
|
|
9.标签提到文章前
在layouts\partials\article\components\details.html修改(注意位置,不然页面会乱):
|
|

在主题的 CSS 文件assets\scss\custom.css中添加以下样式:
|
|
10.菜单栏
下面的方法应该是不对的,但是能用一下。
-
在
\content\page文件夹下新建一个文件夹例如:collection -
新建index.md文件。复制以下代码:
1 2 3 4 5 6 7 8 9 10title: "嘻嘻" date: 2019-05-28 layout: "collection" slug: "collection" comments: false menu: main: weight: -70 params: icon: collection #若找不到icon文件可以先改为search先用着
title:显示在页面的名字
collection:与文件名一致。icon文件存在主目录的\assets\icons内
-
搜索
hugo.yaml文件找到homepage。并添加collection项1 2 3 4 5 6 7 8 9 10 11 12widgets: #部件(主页左边部分) homepage: - type: search - type: links params: limit: 5 - type: archives params: limit: 5 - type: collection #添加以下内容 params: limit: 5
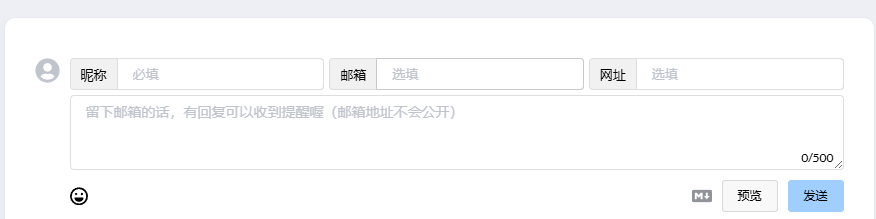
11.评论功能
目前采用utterances评论系统,但是这个评论需要登录github不太方便。
找到了waline评论系统,但是我很菜还没整明白。下面是waline的界面,我看到的大部分blog都是采用这种评论。
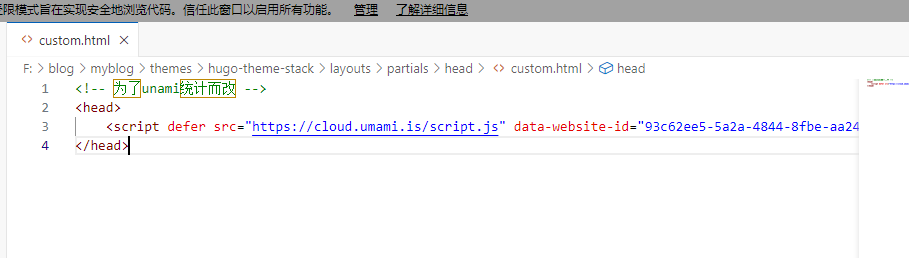
12.统计功能(unami)
unami官网在这里,注册并添加自己的域名。

将下面的代码复制下来
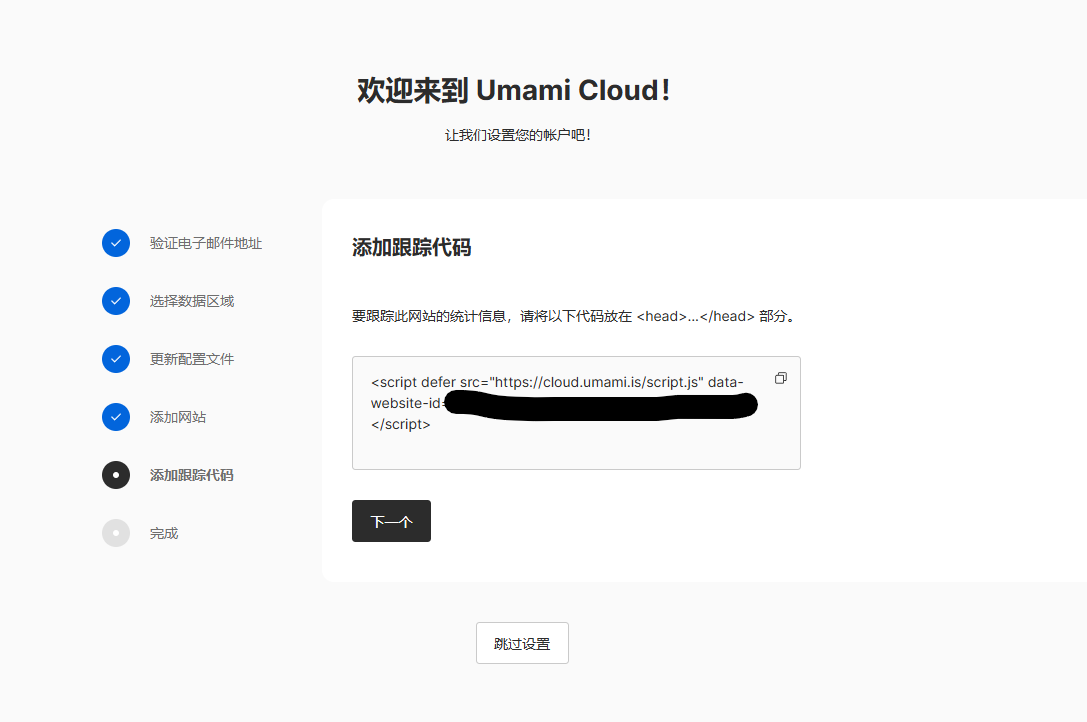
找到layouts/partials/head/custom.html文件复制代码即可
最后就完成啦,可以看到访问量和用户来源地等等。查看网址:Websites | Umami Cloud
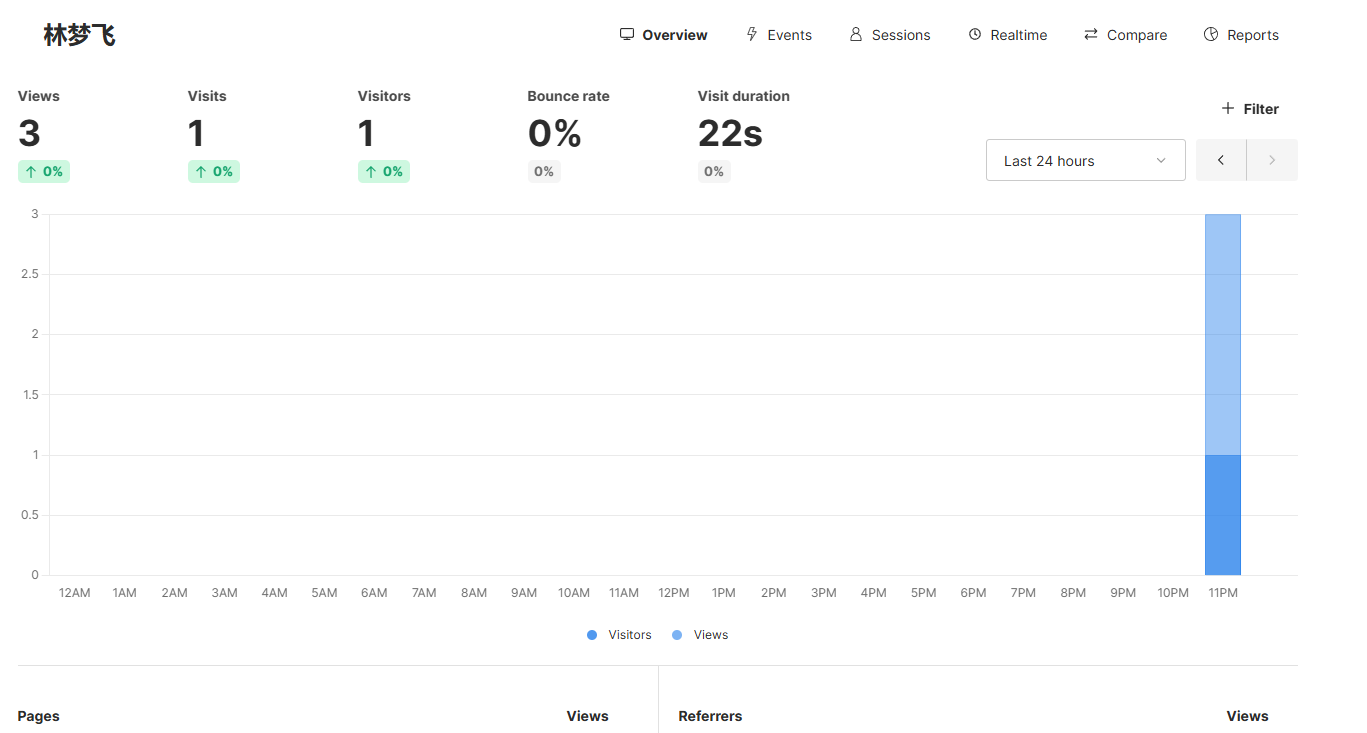
我还不知道怎么把这个数据应用到自己的博客上,只能登录unami的网站看访问数据。
13.文章功能完善
完成 目录去序列号